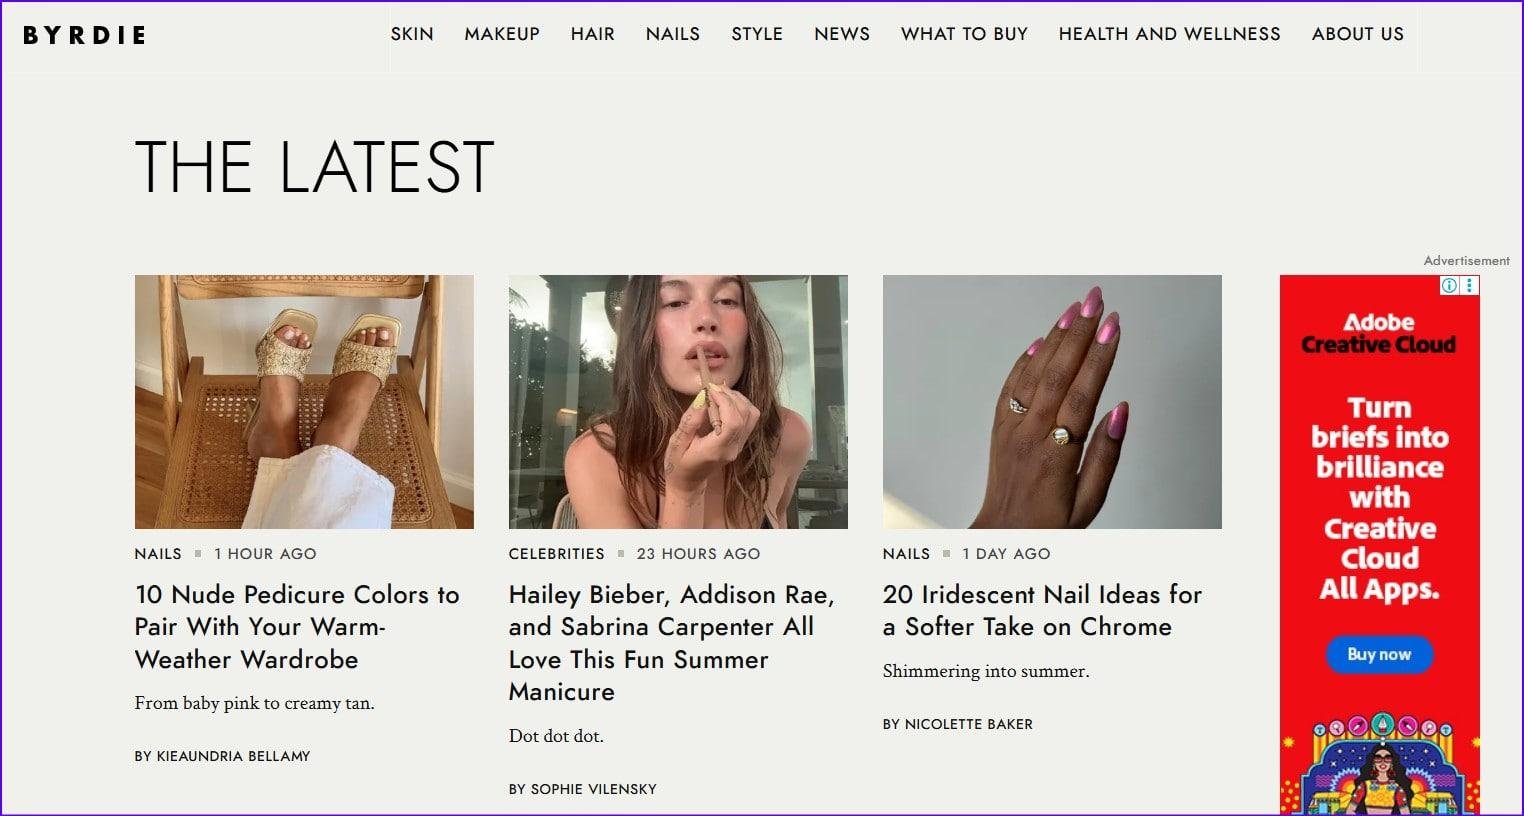
Have you stumbled upon a blog where someone shares beauty tips, skincare advice, or makeup reviews? That’s a beauty blog.
If you’re passionate about beauty and want to turn it into a profitable venture, you’re in the right place.
Beauty blogging is easier than you think, but turning it into a source of income requires strategy. You need the right niche, content, and marketing to attract an audience.
In this guide, you’ll learn the essential steps to create a beauty blog that not only engages readers but also generates revenue. Let’s dive into the basics of building your beauty blog, step by step.
Disclaimer: If you buy any products through links on this site, I may earn a commission. But it doesn't make any difference to your cost, and it helps me keep this blog running. So you could always read my articles for free.
What is a beauty blog?
A beauty blog is an online space where you explore skincare, makeup, haircare, and wellness topics. It helps you discover products, routines, and industry trends through guides, reviews, and tutorials.

Most beauty blogs focus on product recommendations, helping you choose between budget-friendly and high-end brands.
Bloggers test and compare items, sharing insights on ingredients like hyaluronic acid for hydration or retinol for wrinkle reduction.
Tutorials break down makeup techniques, from creating a cut-crease eyeshadow look to achieving a natural, dewy finish.
Some beauty blogs dive into DIY remedies, like using aloe vera to soothe acne or coconut oil for deep conditioning. Others explore beauty industry news—covering sustainability efforts, the rise of vegan cosmetics, or trends like refillable packaging.
Why get into beauty blogging?
If you’ve ever found yourself raving about a new lipstick or warning a friend about a disappointing moisturizer, beauty blogging might be for you.
Blogging lets you share insights, help others, and maybe even earn from your passion. Let’s break down why it’s worth considering.
You control your creative space
With a beauty blog, you decide what to cover—whether it’s reviewing drugstore gems like the Maybelline Fit Me Foundation or testing Drunk Elephant skincare.
You shape your niche, be it budget beauty, sustainability, or high-end luxury. Unlike social media, a blog gives long-term value as your content remains searchable.
You gain industry access
As a blogger, you’ll get firsthand exposure to new products. Many brands, from Glossier to Fenty Beauty, send PR packages to micro-influencers.
Even smaller bloggers receive invites to launches or early product trials. The beauty industry thrives on reviews, and brands value authentic voices.
You build a community and credibility
Successful bloggers like Caroline Hirons or Huda Kattan started by sharing honest skincare and makeup experiences. Even if you begin small, readers trust consistency and expertise.
Whether discussing the benefits of niacinamide serums or the latest K-beauty trends, your opinions shape buying decisions.
You can monetize your passion
Once you build traffic via beauty blogging, income streams open up. Programs like Sephora’s Affiliate Program pay commissions for referrals.
Platforms like YouTube AdSense or sponsored Instagram posts offer revenue options. Some bloggers even launch beauty brands—think Emily Weiss with Glossier.
Steps to start a beauty blog
Have you ever scrolled through beauty blogs and thought, “I could do that”? Beauty blogging is easier than you think. With countless products and trends to explore, you can share your passion and insights.
You might feel overwhelmed by the idea of launching a blog. Don’t worry—I’ll walk you through the essential steps to get your beauty blog up and running.
Pick a sub niche
Picking a sub-niche is the foundation of your beauty blog. A sub-niche is a specific area within the broader beauty industry. It helps you focus your content and stand out in a crowded space.
Start by identifying your interests and expertise. What excites you most about beauty? Is it skincare, makeup tutorials, haircare, or sustainable beauty?
For example, if you love skincare, you could narrow it further to anti-aging routines or acne solutions. Sub-niches like “budget-friendly skincare” or “natural remedies for glowing skin” are highly relatable and popular.
Research existing blogs to find gaps in the market. If there are few blogs focusing on cruelty-free makeup, this could be your niche.
Consider your target audience when choosing a sub-niche. Are you writing for beginners, professionals, or enthusiasts?
For instance, if you focus on beginner-friendly makeup tutorials, you can include simple techniques using affordable products like Maybelline or NYX Cosmetics.
Your sub-niche should also align with current trends or growing interests. Sustainable beauty is gaining traction as people seek eco-friendly options. Highlighting brands like Lush or The Body Shop can attract environmentally conscious readers.
In short, picking a sub-niche helps define your blog’s identity and attract a loyal audience. By focusing on one area, you can create meaningful content that resonates with readers and sets your blog apart from the rest.
Plan blog post ideas
Planning blog post ideas is essential after selecting your sub-niche. This step helps you create focused, relevant content that resonates with your audience.
Start by brainstorming topics that align with your sub-niche.
For example, if you chose “clean beauty,” think about writing posts like “Top 10 clean beauty brands” or “How to transition to clean skincare.” These topics not only showcase your expertise but also attract readers interested in this growing trend.
Research popular subjects within your niche to identify what readers are curious about. Use tools like Google Trends or Pinterest to find trending topics.
If you discover that “DIY natural skincare” is gaining attention, consider creating posts like “Easy DIY face masks using kitchen ingredients.”
Next, think about the types of content you want to create. A mix of product reviews, tutorials, and educational articles keeps your blog engaging.
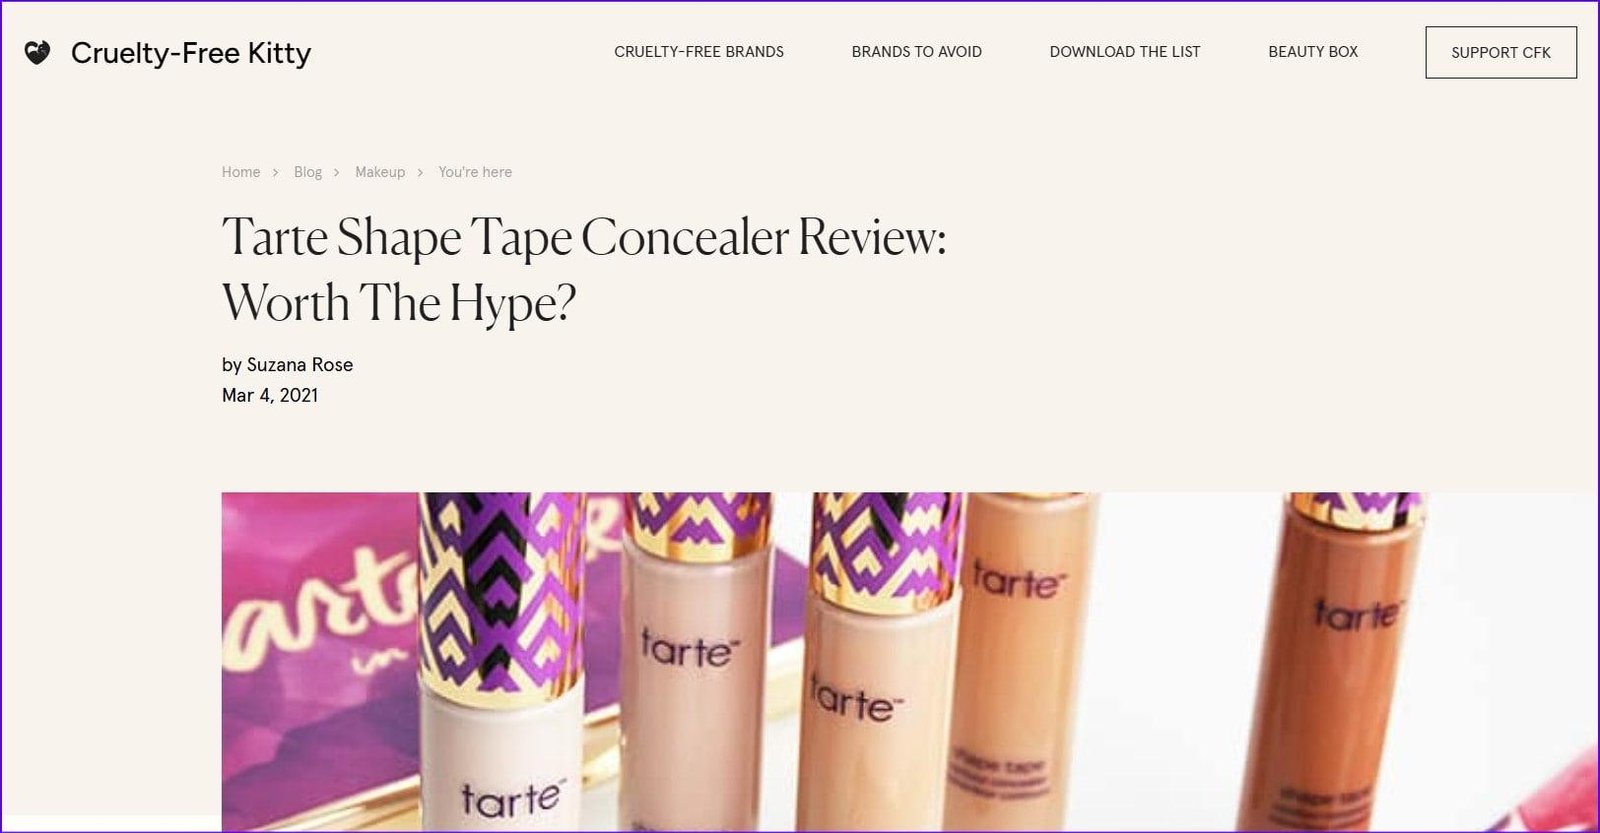
For instance, if your sub-niche is “cruelty-free makeup,” you could write a review of Tarte’s Shape Tape Concealer alongside a tutorial on creating a natural look using only cruelty-free products.

Consider seasonal themes as well. Planning posts around holidays or events can attract more traffic.
For instance, create a guide for “Best summer sunscreens” or “Holiday makeup looks.” These timely topics can help you connect with readers searching for relevant information.
Lastly, keep a running list of beauty blogging ideas in a notebook or digital document. Whenever inspiration strikes, jot down your thoughts. This way, you’ll always have a pool of ideas ready when it’s time to write.
By planning blog post ideas tailored to your sub-niche, you set the stage for consistent and engaging content that keeps readers coming back for more.
Buy domain name
Starting a beauty blog can be exciting, but one of the first steps is buying a domain name. This is your online address and a crucial part of establishing your brand.
A domain is the website address people type to visit your blog, like intothegloss.com or carolinehirons.com.
Your domain name is your blog’s identity, so choosing the right one is important. It should be easy to remember, relevant to beauty, and unique.
Buying a domain is a simple process, but choosing the right name requires thought.
Start by brainstorming names that reflect your niche. If you focus on skincare, something like GlowGuide.com or ClearSkinJournal.com works.
Use domain registrars like Namecheap, GoDaddy, or Google Domains to check availability. A domain registrar is a company that helps you register and manage domain names.
If your preferred name is taken, try slight variations like adding “blog” or “daily” to the name. For example, if BeautyNotes.com is taken, try MyBeautyNotes.com or BeautyNotesBlog.com. Keep it short, simple, and easy to spell.
Once you find an available name, purchase it through a domain registrar. Most domains cost $10 to $20 per year, though premium names can be pricier. Many registrars offer discounts for first-time purchases, so compare prices before buying.
If possible, choose a .com extension—it’s the most widely recognized. However, .net, .co, or .blog are good alternatives if .com isn’t available.
After buying, you’ll manage the domain through your registrar’s dashboard. Here, you can renew it annually and update settings if needed.
A strong domain name makes your blog easier to find and remember. Take your time choosing one that fits your brand and niche.
Get web hosting
After buying your domain name, the next step to starting a beauty blog is getting web hosting.
Web hosting is where your beauty blog’s files, images, and content are stored, making it accessible online. Without hosting, your domain name won’t display a website.
Choosing a reliable hosting provider ensures your blog loads quickly and runs smoothly.
Start by deciding on a hosting type.
- Shared hosting is budget-friendly but slower since resources are shared with other websites.
- Managed WordPress hosting is optimized for WordPress blogs, offering better security and performance.
- VPS or dedicated hosting suits larger blogs but costs more.
Popular hosting providers include SiteGround, Bluehost, and Hostinger. Prices vary, but shared hosting plans usually start at $2.99 to $5.99 per month. Look for plans with SSL certificates (for security) and daily backups (for data protection).
Point nameservers
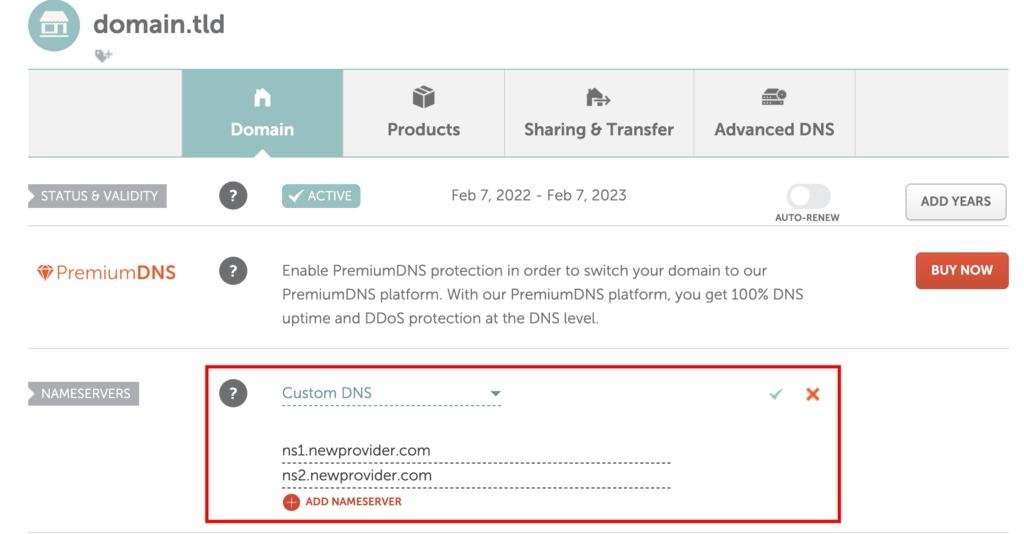
Now that you have hosting and domain. It’s time to make them talk to each other. For this, you need to get something called namerservers from your host and enter them in your domain registrar account.
Nameservers connect your domain to your hosting account, allowing visitors to access your site.
First, log in to your domain registrar, like GoDaddy or Namecheap. Next, find the DNS management section for your domain. You’ll see an option for nameservers.

Enter the nameserver addresses provided by your hosting provider, such as NS1.yourhost.com and NS2.yourhost.com. For example, if you use Bluehost, their nameservers will be listed in your account dashboard.
Save the changes and wait for propagation, which can take up to 48 hours. After updating, check if your site is live by entering your domain in a browser.
Following these steps ensures that your beauty blog is accessible online, allowing you to share your passion with the world!
Install WordPress
To start your beauty blog, you’ll need a platform, and WordPress is a great choice.
WordPress is a content management system (CMS) that allows you to create and manage a website without needing coding knowledge.
Once you’ve chosen a hosting provider, such as Bluehost or SiteGround, you can easily install WordPress. Both of these hosts offer a one-click installation feature.
Log in to your hosting account and find the WordPress installation option in your control panel. Click on it and follow the simple prompts.
During the installation, you’ll be asked to create an admin account. You’ll choose a username and password, which will serve as your login details for the WordPress dashboard.
Once the installation is complete, you can access your blog’s dashboard using the username and password you just created.
This straightforward installation process makes it easy for beginners to focus on content creation instead of technical details.
Pick a WordPress theme
Picking the right WordPress theme is crucial for your beauty blog’s look and feel.
A WordPress theme is a pre-designed template that controls the layout, design, and functionality of your website.
It determines how your blog looks, from colors to font styles, and also affects the user experience.
WordPress offers many free and premium themes to choose from.
For beginners, it’s best to start with a simple, clean theme. Free themes like Astra or GeneratePress are popular for being easy to use and customizable.
These themes come with pre-made designs, which means you can set up your blog quickly without design experience.
If you want more flexibility, Divi is a premium theme with a drag-and-drop builder, so you can easily adjust layouts without coding.
Once you pick a theme, install it directly through your WordPress dashboard. Simply go to Appearance > Themes > Add New and search for your chosen theme. Click “Install” and then “Activate” to make it live on your site.
Choosing the right theme helps set a strong foundation for your beauty blog.
Install essential plugins
Once your WordPress theme is set, the next step of your beauty blogging journey is to install essential plugins.
Plugins are add-ons that enhance your site’s functionality. They are essential because they make it easy to customize your beauty blog and improve its performance, security, and user experience.
For example, Rankmath helps with search engine optimization, making it easier for readers to find your content. Another important plugin is Akismet, which helps protect your blog from spam comments.
If you plan to include an email list, Mailchimp for WordPress is a great tool to build and manage subscribers. To make your blog load faster, install a caching plugin like WP Rocket. It improves your site’s speed, which is important for user experience.
Installing plugins is easy. Just go to your WordPress dashboard, click Plugins > Add New, search for the plugin by name, then click Install Now and Activate.
With the right plugins, you can streamline your blogging process and ensure your beauty blog runs smoothly and effectively.
Write your first blog post
Now that your blog is set up, it’s time to write your first post. A blog post is an individual piece of content that you publish on your blog. Writing your first blog post is exciting and essential for getting your beauty blog started.
Begin by choosing a topic you’re passionate about. It could be a skincare routine, makeup tips, or product reviews.
For example, you could write a post like “Top 5 skincare products for oily skin.”
Next, focus on writing a clear, engaging introduction. Hook your readers by addressing their pain points or needs. Then, provide value by offering helpful tips or insights. Keep your paragraphs short, and use headings and bullet points for easy reading.
Once you finish writing, proofread your post for grammar and clarity using tools like Grammarly or Hemingway Editor.
Add high-quality images to make the post visually appealing. Platforms like Canva can help you create custom images or graphics for your blog.
Finally, publish your post. Keep your tone friendly and authentic, and soon your first post will be live!
Promote your beauty blog
Once your beauty blog is live, it’s time to promote it.
Promoting a beauty blog involves actively sharing and spreading the word about your content. This step is essential to attract readers and grow your audience.
Start by sharing your blog posts on social media platforms like Instagram, Pinterest, and Twitter. These platforms are highly visual and great for beauty content.
A prime example of this is Paula from Paula’s Choice. She grew her brand significantly by sharing educational skincare content and visually appealing product pins on Pinterest.
As a result, her blog saw substantial growth, with Pinterest driving a large portion of her traffic.
Next, consider engaging with your audience by responding to comments and messages. Building relationships with your followers creates trust and loyalty.
Collaborating with influencers or other beauty bloggers can also help expand your reach.
A real-life example of this is Tati Westbrook, a beauty influencer who grew her YouTube channel and blog significantly by collaborating with other beauty influencers like Jefree Star.
Don’t forget about email marketing. Tools like Mailchimp allow you to collect email addresses and send newsletters with new blog posts. This keeps readers engaged and coming back.
Lastly, optimize your blog for search engines using Yoast SEO. This helps your content rank higher in search results, bringing organic traffic to your site.
By promoting your beauty blog consistently through these channels, you’ll increase visibility and attract more readers to your posts.
Monetize your blog
Starting a beauty blog is an exciting journey, but monetizing it can be tricky. Many bloggers struggle to turn passion into profit.
For a beauty blog, monetization offers opportunities to generate revenue while continuing to provide value to your audience.
Start with affiliate marketing. This involves promoting beauty products and earning a commission when your readers purchase them. Programs like Amazon Associates or Sephora’s Affiliate Program are great options for beginners.
Another way to monetize is through sponsored posts. Brands may pay you to write about their products or services.
For example, influencers like Jackie Aina often partner with brands such as Fenty Beauty for paid promotions. This can be a great opportunity when your blog gains traction.
To attract sponsorships, focus on building a loyal audience and creating high-quality content.
You can also sell your own products, such as e-books or beauty guides. Bloggers like Sophie from The Beauty Desk successfully sell skincare routine guides on their blogs.
Lastly, consider displaying ads on your blog. Google AdSense places ads on your site, and you earn revenue based on clicks.
These methods allow you to start generating income once you have regular traffic and engagement. It takes time, but consistency pays off.
Final thoughts on beauty blog creation
Beauty blogging can be a fulfilling journey. You get to share your passion and connect with others. Remember, consistency is key to building an audience. Focus on quality content that resonates with your readers.
Engage with your audience through comments and social media. This builds a loyal community around your blog. Don’t hesitate to experiment with different topics and formats.
From product reviews to tutorials, find what excites you most. As you grow, consider monetizing your blog through affiliate marketing or sponsored posts.
Stay patient and persistent; success takes time. I’ve seen many bloggers flourish with dedication and creativity. Enjoy the process, and let your unique voice shine through!
Did I miss anything? Did you try these tips? Do you have any questions or comments? Share your thoughts below in the comments section.


